カラーミーショップ アプリストアチームのyamotoです。この記事では、Rails Engineによって分離されているアプリケーションの更新をGitHub Actionsのワークフローを用いてホストアプリケーションに適用しやすくする仕組みと、その設定方法の一部を説明します。
GitHub Actions導入前に行なっていたRails Engine更新の手順
私が所属しているカラーミーショップ アプリストアチームが開発を行っているカラーミーショップアプリストアのRailsアプリケーションは、カラーミーショップの本体APIにマウントされるRails Engineとして開発されています。そのためカラーミーショップアプリストアの本番適用にはカラーミーショップの本体APIでのリリース作業が必要です。
GitHub Actionsの導入前に手作業で行なっていた手順は以下の通りです。
- Rails Engine側のリポジトリでリリースを作成する。
- ホストアプリケーション側のGemfileにRails Engine側のリポジトリで作成したリリースタグを書き、bundle installする。
- ホストアプリケーション側のリポジトリにPull Requestを作成する。
- マージし、デプロイを行う。
GitHub Actions導入後のRails Engine更新の手順
GitHub Actionsの導入後に手作業で行なっている手順は以下の通りです。
-
Rails Engine側のリポジトリでリリースを作成する。

-
ホストアプリケーション側のリポジトリに作成されたPull Requestをマージし、デプロイを行う。

導入後は手作業で行う作業はRails Engine側のリリースタグの作成と、ホストアプリケーション側のマージのみとなりました。手作業でbundle installを行なったりPull Requestを作ったりといった単純作業を削減することができました。
GitHub Actionsで行なっていること
設定ファイルの例を交えつつ、Rails Engine側とホストアプリケーション側でどのようなGitHub Actionsを作成して運用しているかを説明します。
1. Rails Engine側に作成したGitHub Actionsが行なっていること
Rails Engine側のActionsワークフローはリリースが作成されたことをトリガーとして、ホストアプリケーションのActionsワークフローを呼び出すのが主な役目です。GitHubの操作にはactions/github-script@v2を使用しています。1
name: "calling host application"

on:
  release:
    types: [published]

jobs:
  calling-host-applications:
    runs-on: ubuntu-latest
    steps:
      - uses: actions/github-script@v2
        with:
          github-token: ${{ secrets.EXAMPLE_TOKEN }}
          script: |
            const version = process.env.GITHUB_REF.replace('refs/tags/', '')
            await github.request('POST /repos/{owner}/{repo}/actions/workflows/{workflow_id}/dispatches', {
              owner: 'owner-name',
              repo: 'repo-name',
              workflow_id: 'incoming.yml',
              ref: 'master',
              inputs: {
                tag: version
              }
            })
scriptの中でホストアプリケーションのActionsワークフローの呼び出しを行なっています。inputsパラメータを使用して呼び出されるワークフローにタグを送信しています。
GITHUB_REFという環境変数にはワークフローをトリガーしたブランチ名またはタグが入ります。2タグのみをその後の処理で使用したいため、replaceして文字列からrefs/tags/を消すようにしています。
2. ホストアプリケーション側に作成したGitHub Actionsが行なっていること
ホストアプリケーション側のActionsワークフローはRails Engine側の呼び出しによって実行されます。
このワークフローが実行された時に行う主な処理は以下の通りです。
- Rails Engine側のActionsワークフローからの呼び出しを受ける
- Gemfileを更新し、bundle installを実行する
- Gitの操作(ブランチ作成、コミット、プッシュ)
- Pull Requestの作成
各項目ごとに説明します。
1. Rails Engine側のGitHub Actionsからの呼び出しを受ける
workflow_dispatchイベントを使用することで、他のワークフローからの呼び出しをトリガーにワークフローを実行させることができます。3
inputsパラメータを使うことで呼び出し元のinputsパラメータで送信した値を受け取ることができます。ここでは呼び出し元で指定したRails Engineのバージョンを受け取っています。
name: "incoming"

on:
  workflow_dispatch:
    inputs:
      tag:
        description: 更新するgem(マウントされるアプリケーション)の最新のリリースタグ
        required: true
2. Gemfileを更新し、bundle installを実行する
inputsパラメータに付与されているタグ名を使用しGemfileに記述されているRails Engineのタグ名を変更します。その後bundle installを実行します。リポジトリのチェックアウトにはactions/checkout@v2を使用しています。4
steps:
  - uses: actions/checkout@v2
  - name: update gemfile
    env:
      VERSION: ${{ github.event.inputs.tag }}
    run: |
      cd ${GITHUB_WORKSPACE}
      sed -i.bak -e "s|^gem 'rails-engine-app', git_source_name: 'example/rails-engine-app.git', tag: '.*'$|gem 'rails-engine-app', git_source_name: 'example/rails-engine-app.git', tag: '${VERSION}'|" Gemfile

  - runs-on: ubuntu-latest
    with:
      entrypoint: /bin/bash
      args: |
        -c " \
          cd ${GITHUB_WORKSPACE} \
          && bundle install
        "
sedコマンドを用いてバージョンを変更している理由としては、Bundlerには特定のgemの特定のバージョンを指定し、bundle installを行うというオプションがないためです。
3. Gitの操作(ブランチ作成、コミット、プッシュ)
手順2.で更新したGemfileとGemfile.lockの差分をPull Requestに含めるためにGitの操作を行います。
- name: create commit and push
  env:
    VERSION: ${{ github.event.inputs.tag }}
  run: |
    cd ${GITHUB_WORKSPACE}
    git config --global user.email "mail@example.com"
    git config --global user.name "user-name"
    git add Gemfile Gemfile.lock
    git checkout -b "update_rails_engine_$VERSION"
    git commit -m "Update Rails Engine $VERSION"
    git push origin "update_rails_engine_$VERSION"
git configには適切な値(bot用など環境に合わせて)を入れる必要があります。
4. Pull Requestの作成
Pull Requestを作成します。GitHubの操作にはactions/github-script@v2を使用しています。1
- name: create pull request
  uses: actions/github-script@v2
  env:
    VERSION: ${{ github.event.inputs.tag }}
  with:
    github-token: ${{ secrets.EXAMPLE_TOKEN }}
    script: |
      const { data: pr } = await github.pulls.create({
        owner: context.repo.owner,
        repo: context.repo.repo,
        title: `Update Rails Engine to ${process.env.VERSION}`,
        head: `update_rails_engine_${process.env.VERSION}`,
        base: 'master',
        body: `
        ## Summary
        Update Rails Engine.
        ---
        This pull request is created by GitHub Actions.
        `
      });
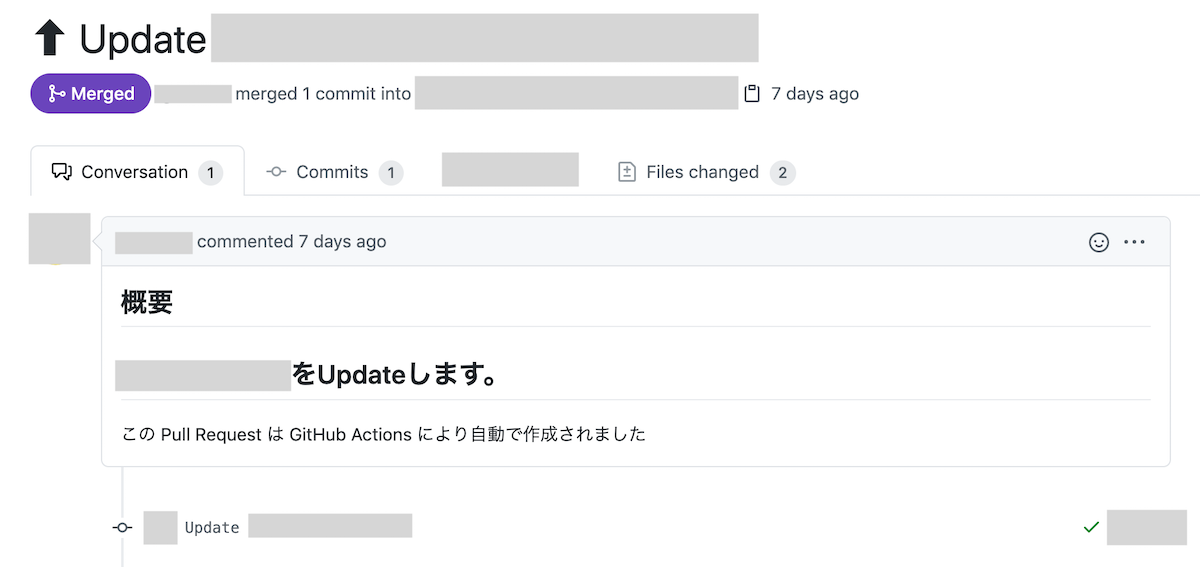
以上の設定で、Rails Engineのリリースを作成するとホストアプリケーション側リポジトリに更新のためのPull Requestが自動的に作成されるようになりました。
おわりに
この記事では、Rails Engineのリリースを作成するとホストアプリケーション側リポジトリに更新のためのPull Requestが自動的に作成される設定を行う方法について説明しました。このActionsワークフローの導入によって更新時にローカルで行う作業や複数の画面操作などを削減することができました。GitHub Actionsを使われている方の参考になれば幸いです。
補足: ホストアプリケーション側で使用しているActionsワークフロー設定ファイルのサンプル
name: "incoming"

on:
  workflow_dispatch:
    inputs:
      tag:
        description: 更新するgem(マウントされるアプリケーション)の最新のリリースタグ
        required: true

jobs:
  create-pull-request:
    runs-on: self-hosted
    container:
      image: bitnami/git:latest

    steps:
      - uses: actions/checkout@v2
      - name: update gemfile
        env:
          VERSION: ${{ github.event.inputs.tag }}
        run: |
          cd ${GITHUB_WORKSPACE}
          sed -i.bak -e "s|^gem 'rails-engine-app', git_source_name: 'example/rails-engine-app.git', tag: '.*'$|gem 'rails-engine-app', git_source_name: 'example/rails-engine-app.git', tag: '${VERSION}'|" Gemfile

      - runs-on: ubuntu-latest
        with:
          entrypoint: /bin/bash
          args: |
            -c " \
              cd ${GITHUB_WORKSPACE} \
              && bundle install
            "

      - name: create commit and push
        env:
          VERSION: ${{ github.event.inputs.tag }}
        run: |
          cd ${GITHUB_WORKSPACE}
          git config --global user.email "mail@example.com"
          git config --global user.name "user-name"
          git add Gemfile Gemfile.lock
          git checkout -b "update_rails_engine_$VERSION"
          git commit -m "Update Rails Engine $VERSION"
          git push origin "update_rails_engine_$VERSION"

      - name: create pull request
        uses: actions/github-script@v2
        env:
          VERSION: ${{ github.event.inputs.tag }}
        with:
          github-token: ${{ secrets.EXAMPLE_TOKEN }}
          script: |
            const { data: pr } = await github.pulls.create({
              owner: context.repo.owner,
              repo: context.repo.repo,
              title: `Update Rails Engine to ${process.env.VERSION}`,
              head: `update_rails_engine_${process.env.VERSION}`,
              base: 'master',
              body: `
              ## Summary
              Update Rails Engine.
              ---
              This pull request is created by GitHub Actions.
              `
            });
